Step by Step
Prerequisites
Before starting, complete the Installation and Configuration steps.
1 Introduction
Catalogues often contain so-called index tabs. These are used to help readers quickly locate chapters. The tabs can be positioned on the left, on the right or on both sides of the spread.
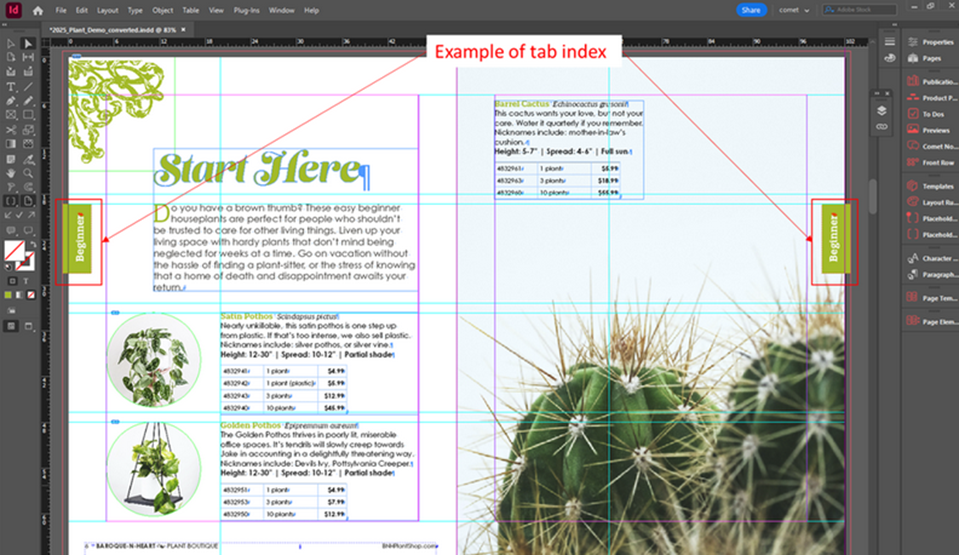
This Acceleration Package standardizes the implementation of tabs for project executions and provides a higher level of automation for users when working with tabs.
The visual definition of the tabs is not part of the Acceleration Package but part of the project implementation / configuration.
They will be defined as Comet templates to be placed on the pages by the Index Tab build script later in the process.
This documentation will guide the user through the necessary configurations during the templating process.
2 Templating
2.1 Parent Document
2.1.1 Layers
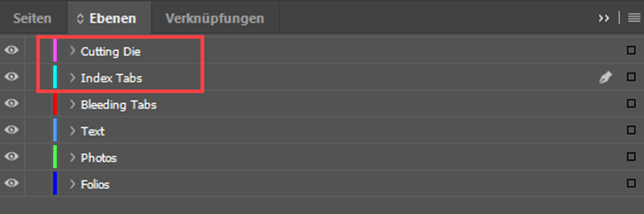
The index tab frames will be placed on a layer called "Index Tabs". When using the special feature Cutting die, those elements will be placed on a layer called "Cutting die". If those layers do not exist in the document, they will be created by the scripts. However, it makes sense to create them directly as part of the parent document to have full control of the layer order and settings.
2.1.2 Object Style
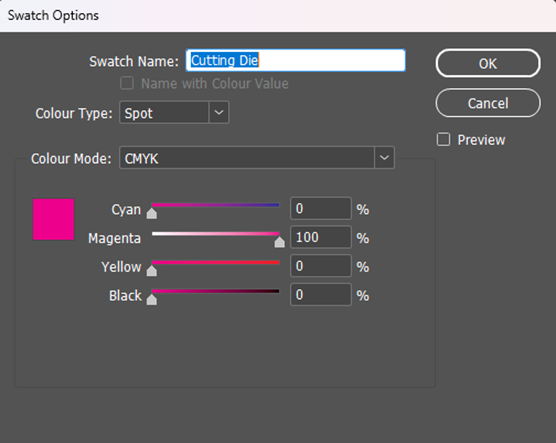
When working with the special feature Cutting Die, a special object style is required which will be assigned to the cutting die geometries. This object style must be part of the parent document and contain all necessary definitions like a spot swatch and overprint configuration.
IMPORTANT: Please ask your print service provider for the exact requirements.
2.2 Template Design
Index tabs can have very different designs in the various projects; therefore, the templating is part of the project implementation and configuration. The Index Tab build script of the Acceleration Package will load and position these templates according to the selected publication metadata for this document (see technical documentation for more information).
2.2.1 Geometry
Standard Comet features like placeholders and layout rules are supported. Even a frame rotation of 90° is valid to support longer chapter names and short chapter characters / numbers likewise.
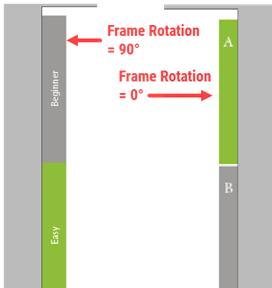
There are a few restrictions and things to take care of:
1.: Only single-frame templates can be supported
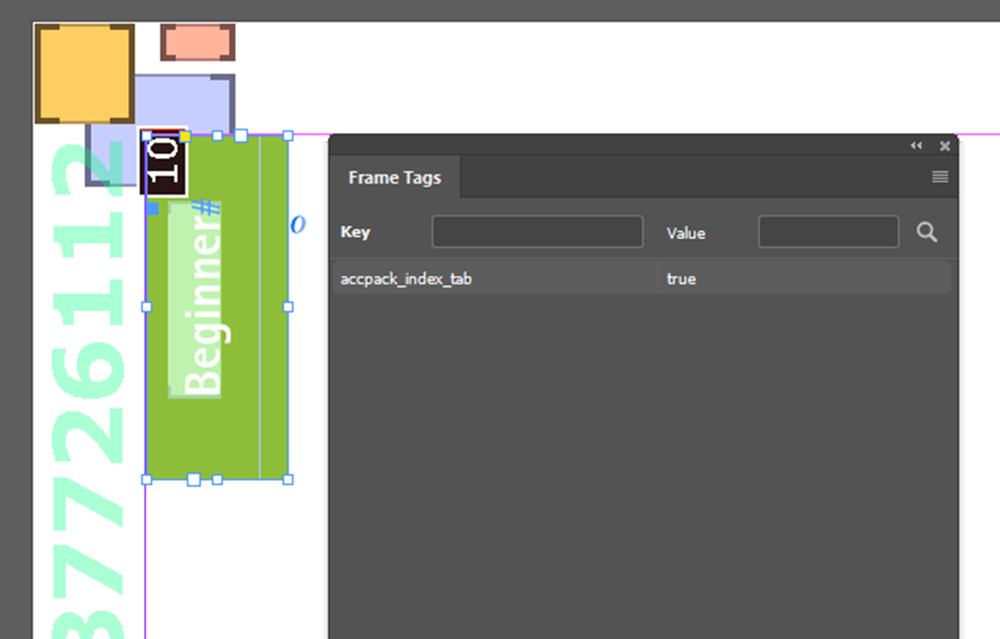
2.: The template frame must have a Comet "Frame Tag" with the key accpack_index_tab. The build script for the index tabs will identify the elements by this Frame Tag key
2.2.2 Placeholder
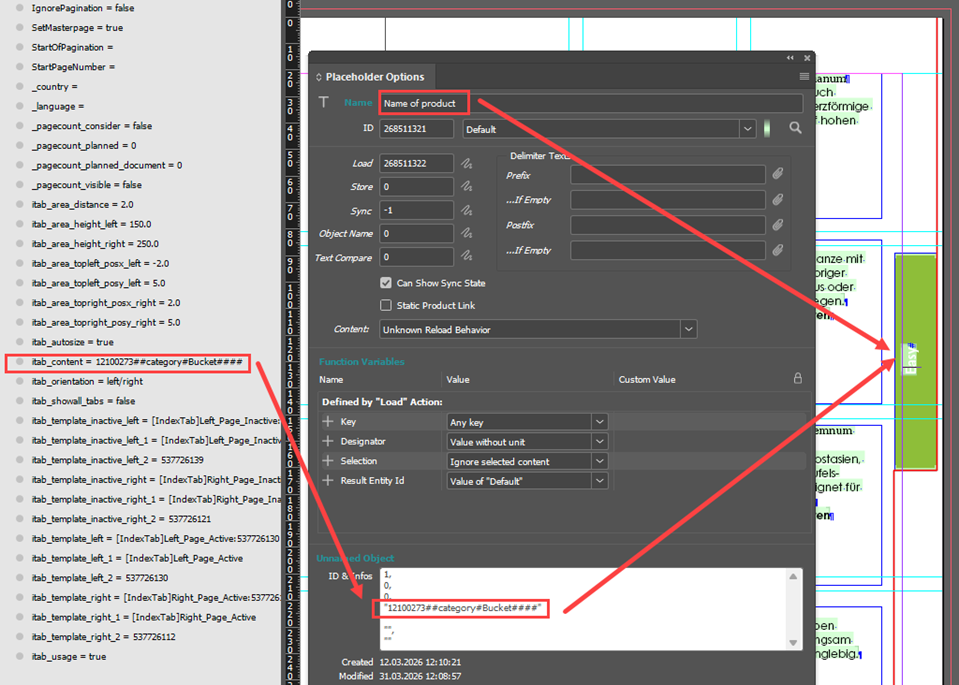
The idea is, that the template will be linked with the selected bucket of the document metadata Content. The template frame (text) has a project placeholder that can load the needed content with this bucket link. (Please note, that the Acceleration Package only supports Record IDs without the parent information)
2.2.3 Special Feature: Cutting die layoutrule
The Acceleration Packages provides a feature to set the cutting die geometry for print versions of a catalogue.
The layout rule [accpack_Index_Tabs] Add Cutting Diewill create cutting die geometries around the created tab. It makes sense to use the standard condition "Has Document Attribute" to only create cutting die geometry when necessary, for example when the Showall checkbox is deactivated like it is the case for most print versions.
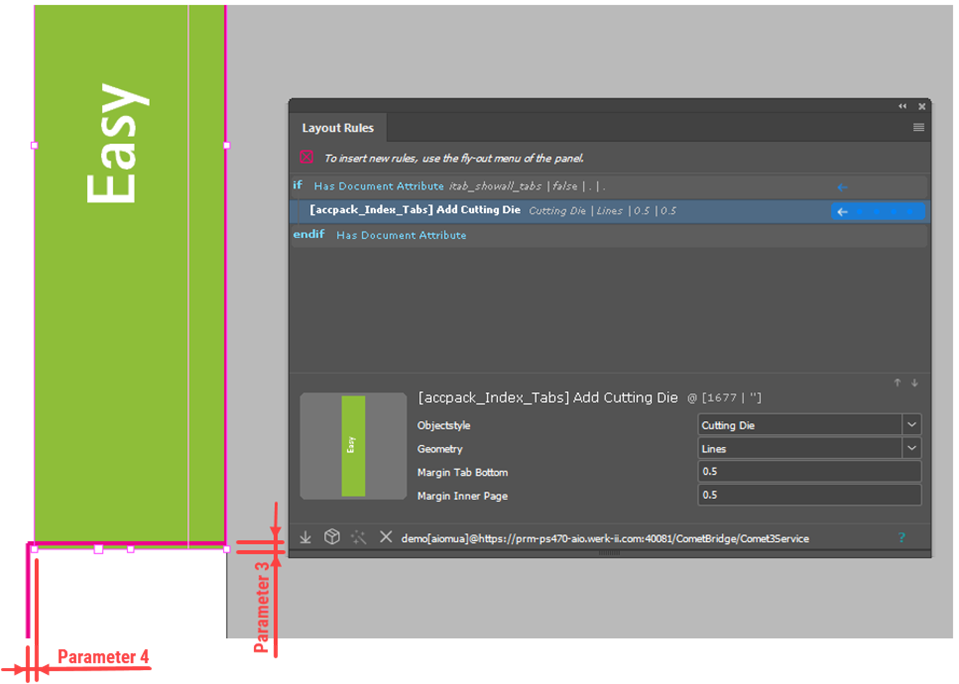
The template creator can set some parameters in the layoutrule [accpack_Index_Tabs] Add Cutting Die.
- Objectstyle: This parameter provides a dropdown of all available object styles of the document. The template creator can select the one created in the parent document (see chapter 2.1.2). This style will be assigned to all cutting die elements this layout rule creates
- Geometry: The typical geometry for cutting dies is the line. But in some cases, the area to be cut away should be marked instead (area below the tab). This parameter allows to switch the geometry from line to area
- Margin Tab Bottom: When working with background colors, you might want to have a margin between the bottom edge of the tab frame to cut away a little bit more to make sure to have a clean edge cut. This margin can be defined in mm.
- Margin Inner Page: The same goes for the cutting die position between the left edge of the tab and the inner page, e.g. when working with page filling images on chapter entry pages

3 To Dos after creating the Templates
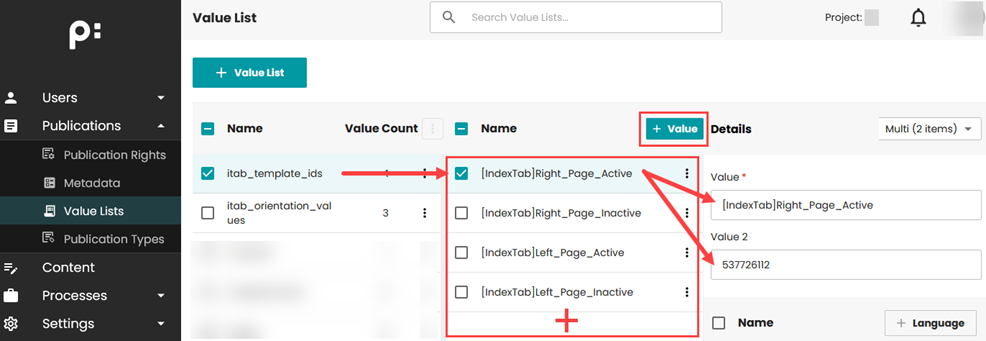
The project consultant has to add the created templates to the value list itab_template_ids in the priint:admin interface, to make them accessible within the dropdown menus in the priint:planner. The existing entries are just examples from the development system and the corresponding templates are not part of the Acceleration Package.
It is required to add the Template name as "Value 1" (this will be the label within the dropdown) AND the Template ID as "Value 2", which will be evaluated by the implementation.